
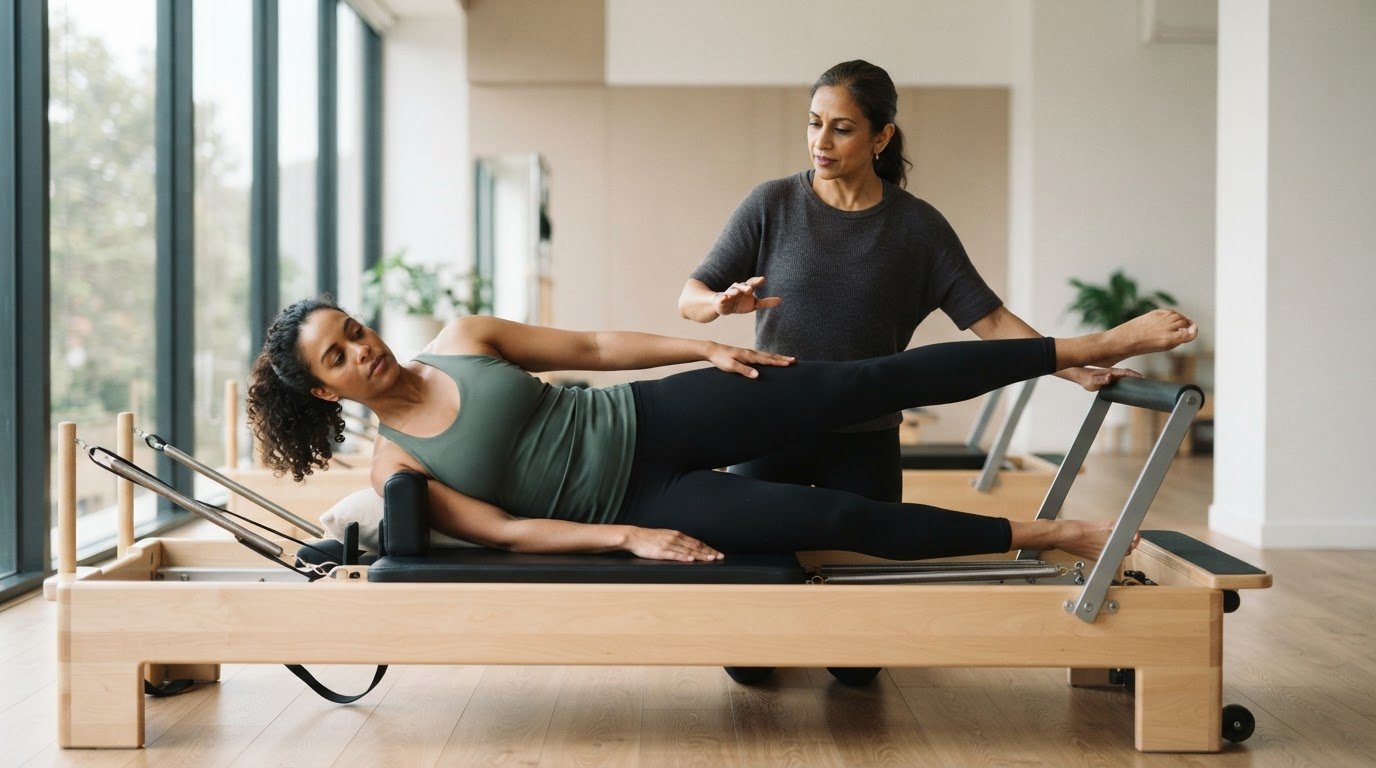
The most useful reformer Pilates cueing tips for instructors begin with a simple principle: combine external cues that guide movement with internal cues that build body awareness. Adapt each cue to the client instead of relying on a fixed script. This balance can support fluid movement and a clearer sense of alignment.
Good cueing isn’t about saying more. It’s about choosing language that helps a client understand what to do, what to notice, or how a movement should feel. The same words won’t work the same way for every body or exercise.
This guide explores how different cue types can shape movement and awareness, then applies these ideas to a Side-Lying Series example. You’ll also find ways to expand your cueing vocabulary, choose imagery clients can relate to, and use body-position cues as a flexible starting point. The aim is practical: make each cue intentional, responsive, and easy to use during class.
Key Takeaways
- Blend cues about movement outcomes with cues that direct attention to body sensations, choosing the emphasis that best supports the client.
- In the Side-Lying Series, use the image of moving the top leg through thick honey to suggest resistance in both directions.
- Build a flexible cueing vocabulary from clear body-position prompts, then adapt the language to the movement and the person.
- Choose imagery clients can relate to, and notice whether it helps them understand and perform the movement.
- Use verbal, visual, and tactile cues responsively, guided by clients’ body language and preferences rather than a fixed script.
Table of Contents
- How cue types affect performance and body awareness
- Side-Lying Series cue example
- Building an instructor’s cueing vocabulary
- Choosing relatable imagery
- How should instructors give clear verbal, visual, and tactile cues in Reformer Pilates?
- ReformerFlow by Ginty: ReformerFlow App Subscription
How cue types affect performance and body awareness
Effective Reformer cueing combines movement directions with attention to body position. For instructors, reformer Pilates cueing tips work best as adaptable options, not fixed scripts.
Body Position Cueing
Body-position cueing directs attention to how the body is arranged during an exercise. Use it to establish a clear starting reference, then adjust the cue as movement changes. For seated work, invite even weight over the seat bones, a long spine, a gently tucked chin, and shoulders rolled back and down. These details make posture easier to feel.
Choose a reference that fits the position. In supine work, cue neutral hips, a small space between the back and mat, a long neck, and a slightly tucked chin. In prone work, cue the tailbone tucked, pubic bone pressing into the mat, and belly lifted. For standing work, describe feet hip-distance apart, even weight, and hips stacked over ankles. Treat each as a guideline, since bodies differ.
Verbal, Visual, and Tactile Cues
Verbal, visual, and tactile cues communicate movement through words, demonstration, or touch. Say “press the carriage away” to name an action, then demonstrate its pathway if clients need a visual reference. Use a tactile cue only with permission. These reformer Pilates cueing tips for instructors help you match the cue to the client’s response instead of relying on one method.
In the United States, instructors should follow the requirements of their certifying organization and workplace; standards vary. To clarify a cue, offer one specific direction, demonstrate when useful, and observe what changes. If a phrase doesn’t help, try a different one rather than repeating it unchanged.
Transition and Class Flow Cues
Transition cues guide clients from one Reformer position or exercise to the next. Give the next instruction before the current movement ends, in a clear order: name the position, state the setup change, then cue the first action. For example, ask clients to finish the press, return the carriage, and prepare for the next position. This sequence gives them a clear route between movements.
To maintain class flow, keep setup instructions specific and concise. Name what changes and what stays steady. For example, cue the next body position while reminding clients to keep a long spine. Demonstrate the setup when words alone don’t make the action clear. Notice where clients hesitate, then refine that transition cue for the next repetition or class. Reformer Pilates cueing tips for instructors are most useful when they support the sequence clients need to follow.
External cues can support flow and performance by helping clients move more fluidly, coordinate their actions, and reduce mental effort. Internal cues direct attention to bodily sensations, muscle activation, and joint positioning, supporting awareness and connection. They can also support posture, joint integrity, and balanced muscle recruitment. Using both gives instructors ways to address movement and body awareness without relying on a single focus.
Body-position cues can provide a foundation, so you don’t need a new script for every movement. Treat alignment cues as guidelines because bodies differ and students may not land in exactly the same position. Pair an external direction with an internal prompt to address both movement and sensation.
Side-Lying Series cue example
A Side-Lying Series makes cue choices tangible: clients can explore alignment, resistance, and control within one movement. Start with position, then add an image that clarifies how the top leg moves.
Side-Lying Alignment Cues
Side-lying alignment cues describe how the pelvis and trunk are organized before movement. Ask clients to stack their hips and gently lift the lower waist away from the carriage. This establishes a clear starting reference without asking everyone to look identical.
Next, observe whether the torso stays steady as the top leg moves. If the hips roll backward, cue the pelvis to face forward; if the lower waist drops, remind the client to lift it gently. Keep the correction brief, then let them try again. These visible adjustments make the cue specific to the movement, rather than a general reminder to “hold better posture.”
Breath, Alignment, and Control
Beginner-friendly cues connect breathing, position, and manageable movement. Invite clients to breathe steadily, keep the hips stacked, and move the top leg through a comfortable range. Give one instruction at a time, so the client can focus on the leg without losing the side-lying setup.
To cue control, describe the action and its pace: “Move slowly through thick honey.” Then ask clients to feel resistance in both directions, on the lift and return. The image gives them a clear quality to explore without a complicated explanation. If the client loses alignment, pause the leg movement and restore the stacked-hip position before continuing.
Form Error Corrections
When correcting form, identify a specific change and offer a cue the client can test. In this series, common observable changes include hips rolling out of their stack, the lower waist dropping, or the top leg swinging quickly. Name the movement you see, then give one concise direction.
For example, if the leg swings, invite the client to move more slowly through thick honey. If the pelvis rolls, cue the hips to face forward before the next repetition. Watch the response instead of layering on several instructions. If one cue doesn’t clarify the movement, change the image or return to the starting position and demonstrate the pathway.
Cue Adaptations for Different Needs
Cue adaptation means changing the language or movement emphasis to suit the person in front of you. Bodies differ, so use stacked hips and a lifted lower waist as adjustable references, not identical shapes every client must achieve. A newer client may benefit from a clear position cue; an experienced client may respond to the sensory image of thick honey.
For pregnancy, injuries, or chronic conditions, don’t assume one cue or range suits everyone. Ask about the client’s movement preferences, observe their response, and adapt the wording and range to their needs and your professional scope. If a position is uncomfortable, don’t press through it; choose a position the client can manage. This keeps your teaching responsive without treating a diagnosis as a single movement instruction.
For instructors refining class preparation around movement choices, planning Reformer classes can help organize exercise sequencing.
Building an instructor’s cueing vocabulary
A cueing vocabulary is a practical set of instructions for guiding movement. Build yours around clear actions, sensations, and setup details, then choose the cue that fits the client and exercise.
An external cue directs attention to a movement’s outcome or effect. For example, in four-point kneeling, “press the floor away” gives clients an action to try. Pair it with specific setup language: hands under shoulders, shoulders away from ears, neutral spine, and abdominal engagement. Each phrase addresses one part of the position.
Create a cue bank by recording alternatives for the same teaching goal. For a neutral spine, try “keep your back long” or “picture a tabletop across your back.” For shoulder organization, cue “draw your shoulders away from your ears.” Test one phrase at a time. If a client changes the movement as intended, keep that wording handy for similar exercises.
Useful vocabulary isn’t a script to recite unchanged. Sort cues by purpose: setup, movement direction, effort, and transition. For example, “hands under shoulders” sets a position; “reach your leg behind you” directs movement. “Keep your trunk steady” adds a focus for control. This simple grouping helps you choose a phrase quickly without stacking several instructions together.
Spring resistance describes the load created by the springs during an exercise. Before movement, state the intended spring configuration for that exercise and machine, then explain what clients should do with the footbar or straps. Pause the exercise while changing the setup. Follow the Reformer’s operating guidance, check that straps are attached as intended, and cue clients to begin only when the setup is ready.
Hands-on cueing uses touch to direct attention to a movement or body position. Ask permission before touching, explain where and why you’d make contact, and wait for a clear yes. If the client declines, offer a verbal cue or demonstration instead. During four-point kneeling, for instance, you can demonstrate a long spine or say, “Keep your back level,” without touching.
Refine the cue after observing the client’s response. If “reach long” creates shoulder tension, replace it with a more specific direction, such as “lengthen your arm without lifting your shoulder.” Keep a short note of the exercise, the cue that worked, and the client’s visible response. These observations build a practical vocabulary you can draw on in later classes.
Choosing relatable imagery
Movement imagery is a verbal comparison that helps a client picture an action or sensation. Choose an image that connects with the client’s experience and clarifies the movement goal. “Reach toward a shelf” suggests direction; “move through thick honey” suggests resistance. The right choice depends on what the exercise asks the client to notice.
Start by naming the movement goal, then match the image to it. For a long arm reach, ask the client to imagine their fingertips moving toward a distant point. For a steady trunk, describe balancing a tray across the pelvis. For controlled footwork, invite the client to press the carriage away smoothly, then return without a sudden change. Each image directs attention to one quality.
Relatability matters. A familiar household task may make sense to one client but not another. Use the client’s own words, interests, or daily activities as a starting point. If they mention carrying groceries, “keep the bag level” could describe steady shoulders during an exercise. If that comparison distracts them, switch to a direct cue, such as “keep both shoulders level.”
Use this short process to choose and refine an image:
- Name the goal: Decide whether the client needs direction, steadiness, length, or control.
- Choose one comparison: For length, picture reaching toward a wall. For steadiness, picture a level surface.
- Observe the movement: Notice whether the comparison changes the intended action.
- Adjust the wording: Keep the image if it helps; replace it if the client’s movement becomes less clear.
A useful image should point toward a specific action, not add a second task. “Grow taller through the crown of your head” can suggest length through the spine. “Imagine a string pulling you up” may also work, but clarify that the pelvis stays grounded if the client starts lifting it. Pair figurative language with a plain direction whenever the image could be interpreted in different ways.
Offer alternatives instead of assuming every client responds to the same sense or metaphor. One person may connect with “press the floor away”; another may prefer a visible demonstration. If imagery creates confusion, drop it. Clear, literal wording works too. Keep a brief note after class, such as “wall reach helped arm length,” to remember which image worked for that movement and client.
Build a flexible imagery vocabulary by linking each comparison to its purpose. Keep separate examples for reaching, stabilizing, pressing, and moving slowly. Then choose one image, give the client time to try it, and observe the result. This makes imagery a practical teaching choice rather than a decorative phrase.
How should instructors give clear verbal, visual, and tactile cues in Reformer Pilates?
Clear cueing matches the communication method to the movement task. Use words, demonstrations, or touch according to the client’s body language and preferences.
A verbal cue uses spoken words to direct attention or action. Keep each instruction specific, such as “press the carriage away” or “keep your shoulders relaxed.” Give the client time to respond before adding another direction. If the first phrase doesn’t help, try a different description instead of repeating it unchanged.
A visual cue demonstrates the movement or position clients are learning. For example, show the pathway of an arm reach before inviting clients to try it. Demonstrate from an angle where the key action is easy to see. Then observe their movement rather than assuming they understood because they watched.
A tactile cue uses touch to draw attention to a body area or movement. Get clear permission before making contact, explain the intended touch, and accept a refusal without pressure. If touch isn’t wanted, demonstrate the movement or offer a verbal alternative, such as “lengthen your spine.”
Choose the cue type by identifying the immediate teaching goal. If a client isn’t sure where to move, a visual demonstration may clarify the pathway. If the movement is clear but feels effortful, a concise verbal direction can refocus attention. If a client prefers tactile information, use touch only with consent and within your training.
Then follow a simple teaching sequence:
- Name the action: Say what the client should do, such as “reach your arms forward.”
- Show or clarify: Demonstrate the pathway or add one short detail, like “keep your ribs settled.”
- Observe: Watch the client’s response and note what changes.
- Adapt: Use a different cue if the movement remains unclear or the client signals discomfort.
Body language offers useful feedback. A client who pauses, looks uncertain, or changes position may need a simpler phrase or another demonstration. A client who moves confidently may need less instruction. If their preference isn’t clear, ask what wording helps and adjust your approach rather than expecting the same cue to work for everyone.
Keep cues compatible when combining methods. Say “keep your hips steady” while demonstrating the leg pathway, rather than adding several unrelated corrections. For a client who prefers verbal direction, describe the same action without touch. For someone who learns through demonstration, show the movement first and add only the essential words.
Use these cueing choices to shape a class plan that fits your teaching approach:
Plan Reformer Pilates classesUse these choices as a starting point, not a fixed script. Continue to notice whether the client seems comfortable, engaged, or uncertain, and let those signals guide the next instruction. A cue that suits one person may not suit another, so adapt the wording or method to the response in front of you. When a client’s preference is clear, respect it; when it is not, ask and adjust. This keeps instruction responsive to the individual instead of relying on a fixed sequence of words, demonstrations, or touch, while keeping the focus on the movement being learned.
ReformerFlow by Ginty: ReformerFlow App Subscription
ReformerFlow by Ginty’s ReformerFlow App Subscription helps instructors plan Reformer classes and organize exercise choices. Use it when you want a structured starting point for sequencing, exercise levels, and spring setups, while keeping your cueing decisions tailored to the people in class.
The app’s curated library includes over 400 exercises, with video, level, and spring-setup details. It personalizes exercise information to your Reformer machine and provides a glanceable teaching mode. Instructors can build a class in about five minutes, then focus on refining transitions and choosing cues that suit their clients. A 14-Day Free Trial is available for exploring the subscription.
Visit reformerflow.app to explore ReformerFlow.
Make your next class a cueing practice
Choose one movement in your next class and notice how clients respond to your cue. If the instruction doesn’t land, pause, adjust the wording, and observe what changes. This small teaching experiment can help you build a more responsive vocabulary over time.
Use these reformer Pilates cueing tips for instructors as a starting point, not a script. Your strongest cues come from matching clear language to the movement, the client, and the moment. Keep exploring what helps each person move with focus and confidence.
When class planning is your next step, explore the ReformerFlow App Subscription through the link below.
Explore ReformerFlowStay curious, keep refining your choices, and let each class inform the next.
Frequently Asked Questions
What are the core principles of effective Reformer Pilates cueing for instructors?
Effective cueing gives each client one clear priority at a time. Before speaking, identify the movement goal, the detail most likely to support it, and the visible change you want to observe. For example, during footwork, focus on smooth carriage control rather than correcting several body parts at once. After the client responds, decide whether to maintain, refine, or replace the cue.