
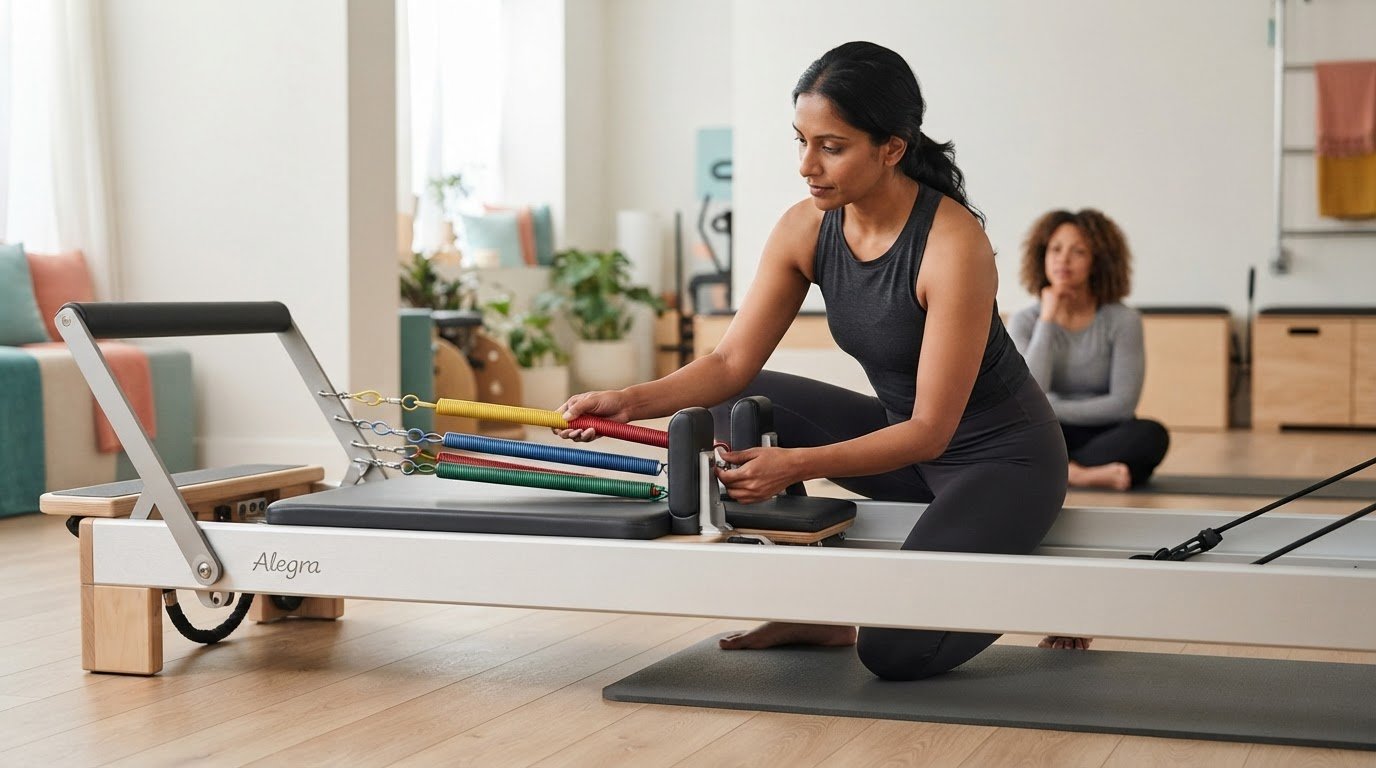
The same spring colour can mean different resistance on different Reformers. That makes a colour-only setup easy to misread, especially when you’re planning a sequence or teaching on a machine you don’t use every day. This visual guide to reformer spring tension starts with a more reliable question: what does the setup mean on this specific machine, for this specific exercise?
If spring charts have left you second-guessing whether to add or remove a spring, the uncertainty makes sense. There’s no universal colour standard, and more springs don’t automatically make an exercise harder. The machine, spring condition, movement, and control required all shape how tension feels.
Learn how to read a spring setup at a glance, compare tension in context, and choose deliberately rather than relying on colour alone. We’ll cover what to check before applying a reference to another Reformer, and how to use visual cues as a starting point while assessing the exercise and the person doing it. The result is a clearer reference for planning and teaching across machines.
Key Takeaways
- This visual guide to reformer spring tension shows how to record spring labels, attachment points, and source references in a machine-specific chart.
- Assess perceived effort alongside exercise position, range of motion, and the needs of the person moving.
- Use a consistent review process: check the machine guidance, exercise demands, client needs, and teaching goal before settling on a setup.
- Keep spring references tied to the machine they describe, so a familiar label isn’t mistaken for a universal setting.
- Pair a quick setup reference with your professional judgment, and explore the linked guide for a deeper machine-specific reference.
Table of Contents
- Visual guide to Reformer spring tension: what a setup actually shows
- How Reformer springs create resistance, and why setup changes the feel
- Compare spring setups visually without relying on a universal chart
- Choose and check Reformer spring tension in the exercise context
- Keep machine-specific spring references ready while you teach
Visual guide to Reformer spring tension: what a setup actually shows
A spring label can look familiar and still mean something different on another Reformer. For instructors planning or teaching across machines, the useful information is more than colour. It’s the full setup: which springs are selected, where they attach, and how that machine identifies them.
Spring tension is the resistance created by the selected springs and the way they’re attached to the Reformer. A visual setup records those choices; it doesn’t provide a universal resistance measurement. The Pilates method emphasizes controlled movement, so a spring diagram is one part of understanding the task, not a verdict on how challenging it will feel.
How to read a spring setup at a glance
Read a setup as a compact equipment note. First, count the selected springs. Next, identify each spring using the machine’s colour, label, or symbol. Then check the attachment point shown in the diagram. Notation may use colour names, terms such as “light” or “heavy,” symbols, or conventions specific to the manufacturer. Record the machine model or reference alongside the notation so the setup stays connected to its source.
Illustrative setup diagram key
- Springs: Selected springs, identified by the machine’s own labels
- Attachment points: The specific pegs or hooks where the springs connect
- Carriage: The moving platform connected to the spring system
Illustrative only. The diagram key explains what to identify, not a recommended setup or tension level.
This visual guide to reformer spring tension is most useful when it helps you reproduce a setup accurately on the same machine. A colour or label without its attachment point and machine reference may leave out essential context.
Why spring colour is not a universal tension scale
Manufacturers can assign different meanings to the same colour, and some use entirely different labels. There’s no industry-wide colour key that lets an instructor reliably translate a spring colour into an equivalent resistance across brands. Don’t treat a familiar colour as proof that two setups will feel the same.
Use the machine’s manual, markings, or manufacturer-provided reference to interpret its spring system. Before applying a chart to another Reformer, confirm the machine and attachment details. Keep the source with your notes, too. That turns a visual cue into a machine-specific reference while leaving the final exercise choice open to professional judgment.
How Reformer springs create resistance, and why setup changes the feel
A selected spring resists being lengthened, helping pull the carriage back toward its resting position. As the carriage moves and the spring extends, the resistance experience changes. The exact feel depends on the spring system and Reformer, so this is a useful general model, not a claim that every machine behaves identically.
Illustrative sequence: same spring set, different carriage position
- At rest: The selected springs connect the frame to the carriage, with little or no extension shown in this simplified illustration.
- Under extension: The carriage moves away from its resting position, lengthening the springs and increasing their pull toward that position.
This sequence is illustrative only. Actual spring behavior and setup conventions depend on the Reformer model.
Spring resistance and client effort are related, but they aren’t the same thing. The spring provides resistance; the mover experiences effort through the demands of the exercise. A spring count or colour can’t tell you how challenging a movement will feel for a particular person.
What changes when you add, remove, or reposition a spring?
Adding or removing a spring changes which springs contribute resistance. Repositioning one may also change how the setup behaves, depending on the machine’s design and attachment options. Don’t assume a particular hook or label has the same effect across models. Check the Reformer’s manual or manufacturer guidance before interpreting undocumented spring equivalencies.
Why the same setup can feel different across exercises
Position, leverage, range of motion, and movement demands all shape perceived effort. Consider a person moving the carriage with their feet while lying down, then using their arms in a different position. Even with the same spring set, the points of contact, body support, and control required would differ. The visual setup describes the springs, not the full movement experience.
Machine construction can influence feel, too. Carriage weight, bearings, and frame materials are part of the context, so an identical-looking setup may not feel identical on another Reformer. A visual guide to reformer spring tension helps you record and compare configurations, but it can’t predict a client’s effort by itself.
Use the diagram as one input. Consider the machine’s guidance, the movement’s demands, and the individual mover’s response. Then assess whether the tension supports the intended work. For exercise details alongside machine-specific spring configurations, ReformerFlow’s instructor app can serve as a practical reference.
Compare spring setups visually without relying on a universal chart
A useful comparison doesn’t turn spring colours into a cross-brand scale. It preserves the details that make a setup meaningful: which Reformer it belongs to, how its springs are labelled, where they attach, and where the information came from. This visual guide to reformer spring tension uses placeholders to show how one exercise might be recorded in different machine systems.
A safe visual comparison checklist for instructors
Before interpreting a chart, confirm the Reformer make or model. Match its colours and symbols to the springs on that machine, then record the source and date if your studio keeps a shared reference. These checks help prevent a familiar label from being mistaken for an equivalent setup elsewhere. Keep every entry connected to its machine.
Comparison table template
MachineSpring labelsAttachment pointsSource reference\[Make/model\]\[Machine-specific label or symbol\]\[Documented peg or hook\]\[Manual or verified reference, date\]
Illustrative example, same exercise: Footwork
- Machine A: \[Label A\] + \[Label B\], attached at \[Point 1\].
- Machine B: \[Symbol ○\] + \[Symbol △\], attached at \[Point 2\].
These are placeholder labels, not real manufacturer specifications. The examples show different ways to document a setup, not equivalent resistance or a recommended Footwork configuration.
Compare the setup within its machine system, not by colour alone. Two entries can describe the same exercise while using different notation. Without each machine’s own reference, there’s no reliable basis for treating their labels as interchangeable.
What a useful spring tension diagram should include
Give every diagram enough context to be checked and reused: machine make or model, exercise name, selected springs, and attachment points. Include a source reference, and mark the diagram as illustrative if exact model-specific specifications haven’t been verified. This makes clear what’s confirmed and what’s simply an example.
Separate fixed machine information from client-specific adjustments. A machine reference records labels and attachment locations; an instructor’s note can capture an adjustment made for an individual or teaching goal. Keeping those layers distinct makes a visual chart easier to interpret without turning it into a universal prescription.
Choose and check Reformer spring tension in the exercise context
A spring reference can narrow the options, but it can’t make the decision for you. Treat it as one part of a professional review. Check the machine’s guidance, the exercise demands, the mover’s needs, and your teaching goal. Then watch how the movement responds and adjust within your training and studio protocols.
The same setup won’t necessarily suit every client or class. A visual guide to reformer spring tension is most useful when it supports observation and judgment, rather than turning a chart into a fixed prescription.
A four-step review before teaching the exercise
- Identify. Confirm the exact Reformer and how its spring set is labelled. Don’t rely on memory or a colour key from another machine.
- Verify. Check the planned exercise setup against a trusted reference for that model, including the selected springs and attachment points.
- Observe. Watch the mover perform the exercise. Consider control, alignment, range, and whether the movement reflects the intended teaching goal.
- Reassess. If the setup doesn’t support the exercise or the person’s needs, review it using your professional judgment and follow studio protocols.
Identify, verify, observe, reassess. This sequence keeps the machine reference in view while making room for the person and the purpose of the movement.
Common spring-selection mistakes to avoid
Three shortcuts can undermine a thoughtful setup: transferring another machine’s colour key without checking its conventions, using spring count as a complete measure of difficulty, or presenting one configuration as right for every client. Spring labels describe a machine’s system; they don’t reveal the mover’s effort or whether the setup suits the exercise.
Keep the review specific. A change in position, range, control, or teaching emphasis may affect how the exercise feels, even if the spring notation stays the same. Notice whether the mover can work with the intended quality, and reassess if the setup appears to interfere with that goal. Don’t treat a visual chart as a substitute for observing movement or applying your training.
For planning or teaching across machines, a machine-specific exercise reference can make the verification step easier to repeat. It remains a reference, not a replacement for instructor judgment.
Explore the ReformerFlow instructor app## Keep machine-specific spring references ready while you teach
A reliable spring decision brings three things together: information for the specific machine, the demands of the exercise, and the needs of the person moving. Keeping a clear reference close at hand can reduce setup guesswork, but it doesn’t replace checking the machine or observing the exercise in practice.
Build your reference around the Reformers in your studio. Record each machine’s make or model, its spring labels and attachment points, and the source used to verify the setup. If colleagues use different names for the same spring, agree on a shared notation while preserving the machine’s own labels. That makes notes easier to read without suggesting that different systems share a colour scale.
For a deeper look at recording configurations for a particular machine, see this Reformer Pilates machine spring setup reference. Keep any shared chart tied to its source, and update it when you confirm a machine-specific detail.
Use a teaching reference without losing instructor judgment
ReformerFlow is an app-based planning and teaching aid for instructors. Its library includes over 400 curated Reformer exercises with exercise videos, levels, and spring-setup details, including configurations personalized to the instructor’s machine. These details can help you prepare and keep a setup reference accessible while teaching. Use them as a prompt to verify the machine and consider the exercise, not as a substitute for your training or assessment of the mover.
A useful visual guide to reformer spring tension should make a setup easier to recall while keeping its limits clear. Machine-specific references support consistency; your observation and judgment guide decisions for the person in front of you.
If a digital reference fits your workflow, ReformerFlow is available to download with a 14-day trial. Explore it as an optional way to keep exercise and spring details close during planning and teaching.
Explore ReformerFlow and start the 14-day trial## Make every spring choice deliberate
Spring colours are machine-specific, so read a setup through its labels, attachment points, and trusted machine reference rather than colour alone. Then consider the exercise, the mover, and your teaching goal. A chart can support your decision, but observing movement and applying instructor judgment complete it.
This visual guide to reformer spring tension offers a framework for planning and teaching: identify the machine, verify the setup, observe the movement, and reassess as needed. Keeping a clear machine-specific reference close helps reduce uncertainty without turning one configuration into a rule for every body.
ReformerFlow brings together over 400 curated Reformer exercises with video, level, and spring details, including configurations personalized to the instructor’s specific machine. Use it as a practical reference alongside your own professional judgment.
Explore ReformerFlow and start your 14-day trialWith reliable references and thoughtful observation, you can teach with greater clarity and make each setup more intentional.
Frequently Asked Questions
Are Reformer spring colours the same across all machines?
No. Reformer manufacturers use different spring colour conventions, so the same colour can represent different spring categories on different machines. Don’t assume a colour indicates a universal resistance level. Check the manufacturer’s information for the exact Reformer you’re using, and confirm that any chart matches its spring labels and attachment points before applying it to an exercise.
How do I know which spring tension to use for a Reformer exercise?
Start with trusted guidance for the specific Reformer and exercise, then consider the movement demands, the client’s needs, and your teaching goal. Observe how the person moves and use your professional judgment to assess whether the setup supports the intended work. A visual guide to reformer spring tension can help you interpret a reference, but it can’t prescribe one setting for every body.
Can I use a spring chart from a different Reformer brand?
Use another brand’s chart as a comparison aid only after confirming how its notation differs. Spring colours, labels, and attachment conventions aren’t universal, so a chart from one machine may not translate directly to another. Verify the make or model and consult that Reformer’s own manual or manufacturer reference. Record the source with any shared studio notes to keep the setup traceable.
What happens if I use too much or too little spring tension?
The effect depends on the exercise, machine, and mover. A setup that doesn’t suit the task may make it harder to control the carriage or maintain the movement quality you’re teaching. Rather than judging by spring count alone, observe how the client manages the movement, range, and control. Reassess the setup within your training and studio protocols if it doesn’t support the intended exercise.
Does adding more springs always make a Reformer exercise harder?
No. Adding springs changes the resistance experience, but it doesn’t automatically make an exercise more challenging for every mover. The person’s position, leverage, range of motion, and control demands also affect perceived effort. In some exercises, lighter resistance may require more stability or precision. Assess the movement in context instead of treating the number of springs as a complete measure of difficulty.
How can I tell whether a spring setup is right for a client?
Observe whether the setup supports the exercise’s purpose and allows the client to work with the intended control and movement quality. Consider their needs, position, range, and response rather than relying on a chart alone. If the movement isn’t meeting the teaching goal, reassess using your professional judgment and studio protocols. No single setup is automatically appropriate for every client or class.
Can an app show spring settings for my specific Reformer?
Yes. ReformerFlow includes spring configurations personalized to the instructor’s specific Reformer, alongside spring details for exercises in its library of over 400 curated Reformer exercises. The app also includes exercise videos and levels. Treat any app reference as a practical planning and teaching aid: confirm the machine information and apply your judgment to the exercise and client in front of you.