
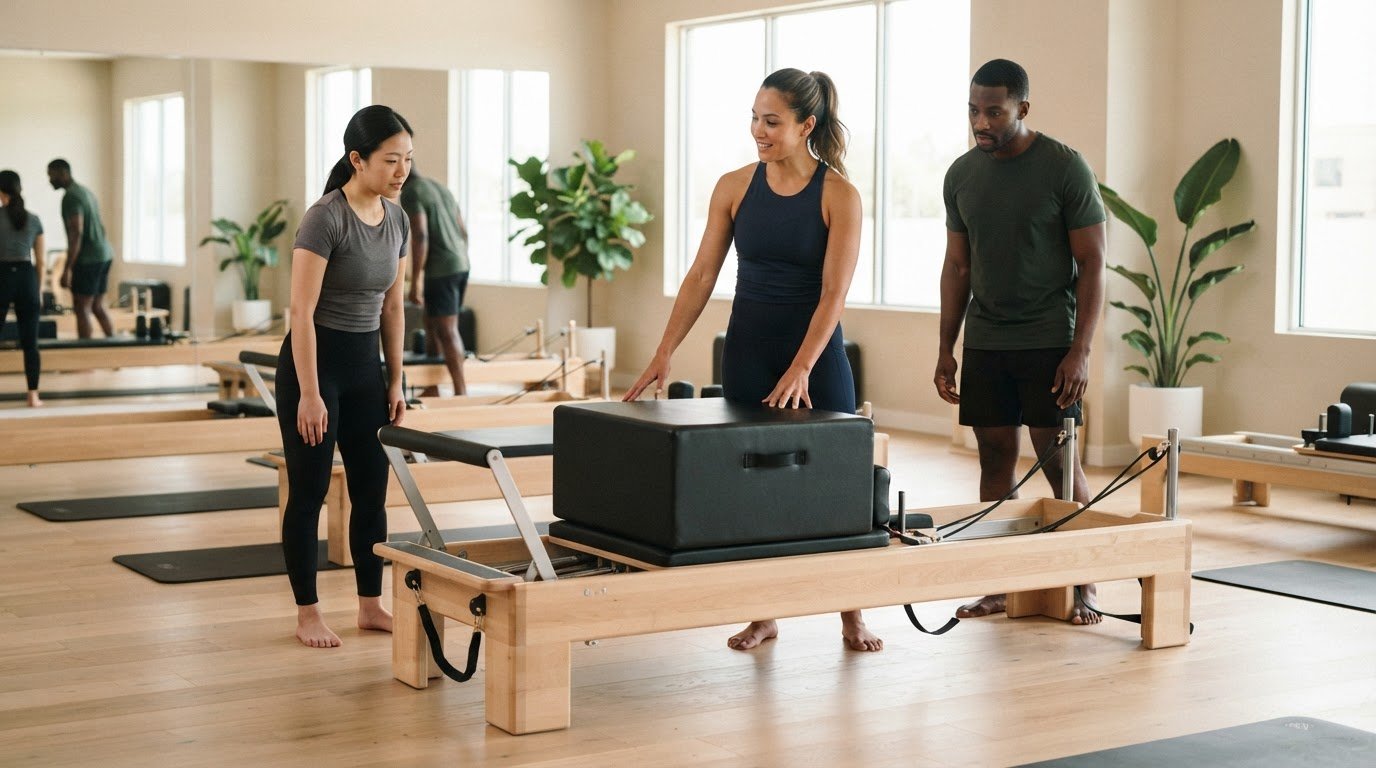
What if adding a box makes a Reformer sequence less focused, not more? When using the pilates box in a reformer class, the difference comes down to purpose. A change in height or position can support a teaching objective, but an unclear setup or rushed transition can distract participants from the movement.
If you’ve ever paused to decide which orientation best serves the class, or felt box work was added simply for variety, that hesitation makes sense. The box should earn its place in the sequence. Clear intent helps you choose a setup, explain it efficiently, and keep participants focused as they move.
This guide covers how to set up, cue, and program the Pilates box with a specific objective in mind. You’ll consider how the setup relates to the movement, how to make transitions easier to follow, and how to adapt your plan to the equipment and participants in front of you. The goal is box work that feels integrated, taught with clarity and guided by sound instructor judgment.
Key Takeaways
- Choose a box setup that serves the exercise and teaching objective, rather than adding it just for variety.
- Before class, select and position the box, check its stability, and rehearse the transition for the specific Reformer model.
- When using the pilates box in a reformer class, weigh its support and positioning benefits against keeping the movement on the carriage or choosing another supported setup.
- Give equipment instructions first, then cue the movement so participants can focus on one task at a time.
- Use class-planning references to organize exercise choices and spring details, while grounding setup decisions in your training and instructor judgment.
Table of Contents
- Using the Pilates Box in a Reformer Class: What It Adds
- Set Up the Pilates Box for Reformer Work with Intention
- Choose Box Work That Fits the Class and the Participant
- Teach Pilates Box Exercises with Clear Cues and Smooth Transitions
- Build Box Work into a Reformer Class Plan You Can Teach with Confidence
Using the Pilates Box in a Reformer Class: What It Adds
A Pilates box is an accessory placed on or alongside the Reformer to change a participant’s support surface, position, or movement demands. Its value isn’t novelty; it’s the teaching purpose it serves. Start with a clear question: what do you want the participant to explore that the current setup doesn’t offer?
The box is optional, not a requirement for a complete class. It can provide a different point of support, change the participant’s orientation to the carriage, or introduce a new balance or leverage demand. The effect depends on the exercise, the person, and the Reformer setup, so the same box position won’t create an identical experience for everyone.
What changes when a Pilates box is added to the Reformer?
Height and surface matter. Elevating part of the body can change joint positioning and the relationship between the participant and the moving carriage. A new support surface can also alter how weight is distributed. Depending on the exercise, that shift may change leverage, balance demands, or available movement range.
Focus on the movement you’re teaching, not a guaranteed result. A position that offers useful support for one participant may feel restrictive or less stable for another. Compare the proposed box setup with the same movement on the carriage: what changes in the participant’s orientation, contact points, or ability to organize the movement? If you can’t identify a relevant change, the box may not be needed.
Start with the teaching objective, not the accessory
Choose the intention first. You might use a box to offer a different support surface, help a participant explore a new orientation, or introduce a movement challenge that suits the class. Then decide whether the box is the clearest way to serve that intention. The better choice may be to keep the exercise on the carriage or use another supported setup.
Before adding box work, make the purpose concrete:
- Support: What part of the movement or position will the box help the participant organize?
- Orientation: How will changing the participant’s position affect their experience of the exercise?
- Challenge: What movement demand are you introducing, and is it appropriate for this participant and class?
These prompts keep the accessory in service of the class plan. If the only reason to use the box is to make the sequence look more varied, pause and reconsider. A purposeful choice connects to what participants are practicing, not simply to the equipment available.
Box orientation and placement depend on the exercise and Reformer model. Treat each choice as exercise-specific, and follow applicable equipment instructions and instructor training to determine whether a setup is appropriate. Then prepare the box and plan how participants will move into the exercise.
Set Up the Pilates Box for Reformer Work with Intention
A clear setup starts before participants approach the Reformer. Identify the planned movement and starting position, then choose the box orientation and placement to suit both the exercise and the machine. Details vary by Reformer model, so use the manufacturer’s instructions for model-specific placement rather than assuming one arrangement works for every carriage.
Setup principle: Check the box and carriage before inviting movement. A stable, correctly placed box and a prepared Reformer let you give concise instructions instead of sorting out equipment questions mid-transition.
Choose and position the box for the planned movement
Picture the participant’s position and the full path of the movement before placing the box. Check that it sits as intended and won’t obstruct the carriage, straps, or the participant’s planned range. Confirm that it feels stable in that position. If the setup differs from the manufacturer’s guidance, don’t use it for the exercise.
Prepare the Reformer and teach the setup clearly
Scan the carriage, straps, footbar, and surrounding space before class use. Decide how participants will approach the apparatus, get into the starting position, and dismount. Rehearse the change yourself so you can demonstrate it smoothly and give one instruction at a time. A quick review of Merrithew’s guide to the Pilates Reformer can also reinforce how the moving carriage fits into the apparatus setup.
- Select: Match the box to the planned exercise and participant position.
- Position: Follow the equipment instructions for the Reformer model and intended orientation.
- Check: Confirm the box is stable, the carriage is prepared, and the planned movement has clear space.
- Rehearse: Practice the entry, starting position, and exit before teaching the transition.
Keep equipment directions separate from movement cues. First explain where the box goes and how participants should get into position. Pause while they set up, then give the movement cue. This gives participants one task at a time and gives you a moment to check that the setup matches your plan before movement begins.
Spring choice is a separate planning decision from box placement. If the exercise also calls for a spring change, account for that transition in advance and review the Reformer spring setup guide. ReformerFlow’s exercise library includes spring-setup details personalized to an instructor’s machine, which can support class preparation without replacing equipment guidance or your judgment. For a more organized planning workflow, explore the ReformerFlow class-planning app.
Choose Box Work That Fits the Class and the Participant
The box isn’t automatically a progression. It changes the setup, but whether that helps depends on the participant, the exercise, and the focus of the class. Compare the planned movement with a version on the carriage or another supported setup. If the box offers a useful change in position, access, or movement variation, it may serve the objective. If it adds equipment steps without clarifying the work, keep the setup simple.
When does the box support the class objective?
Use the box when its role is clear. It may offer a different support surface or make a planned orientation possible. Consider the group’s experience and the class focus, then ask whether the box gives participants something useful to explore. If the answer is hard to explain, or setup would interrupt the flow, the carriage or another familiar support may be a better choice.
Use this comparison to weigh the options. The specific role and adaptation will vary with the exercise, participant, and equipment.
Teaching intentionBox roleSetup demandAdaptation to considerExplore a different body positionProvides an alternate support surface or orientationPosition and check the box for the planned exerciseKeep the movement on the carriage if that position is already clear and comfortableOffer another way into the movementChanges how the participant meets the apparatusAllow time to establish the setup and transitionUse a supported alternative or smaller range if the position doesn’t suit the participantIntroduce a movement variationChanges leverage or balance demands, depending on the exerciseConfirm the setup supports the intended movementReturn to a simpler setup if control or comfort changes
How can instructors adapt box work for different participants?
Observe the person in the setup rather than assuming one variation suits the whole class. Comfort, control, and the ability to follow the movement can help you decide whether to continue, adjust the range, or choose a different support. A participant can stay with the carriage-based version while others use the box, provided you can supervise both options clearly.
Keep the choices neutral and specific. You might offer the planned box setup, a supported alternative, or a reduced range. Avoid presenting one option as the universal beginner or advanced version. The relevant choice is the one that fits the participant and the class intention in that moment. Instructor observation matters more than a fixed progression. If managing several variations would divide your attention, simplify the group setup and keep the teaching focus intact.
Teach Pilates Box Exercises with Clear Cues and Smooth Transitions
Box work is easier to teach when participants hear one clear task at a time. Start by explaining why the box is part of the exercise. Next, guide the equipment setup and help everyone find the starting position. Only then add movement cues. This sequence keeps instructions easy to follow and lets you confirm the setup before the carriage moves.
Teaching principle: Give the setup cue before the movement cue. Participants can focus on positioning themselves first, then listen for what to do.
Cue the setup before the exercise begins
Make the setup instructions concrete. Name the box position, the participant’s starting position, and the intended direction of movement. Demonstrate the arrangement or visually confirm it before adding details about breath, tempo, or alignment. Keep the language specific to the exercise. A short pause between setup and movement lets you scan the group and address a misplaced box or unclear starting position.
- Explain the purpose: Give participants a brief reason for the box in this exercise, such as changing their support or orientation.
- Direct the setup: State where the box belongs and how participants should approach it.
- Establish the start: Confirm each participant’s position and the direction they’ll move.
- Cue the movement: Add the action and relevant movement details once the setup is ready.
Avoid combining several equipment changes with a detailed movement explanation in one long cue. First give the box instruction and allow time for participants to set up. Follow with the starting position. Once everyone is ready, cue the movement. The exact words depend on the exercise and your teaching approach, but this order keeps the instructions clear.
Plan the box transition before teaching the class
Transitions need the same intention as the exercise. Before class, decide what must move, where it will go, and what participants need to reset before the next movement. If the box must be repositioned or removed, build that time into the sequence instead of giving directions while participants are already changing position. A planned transition helps protect attention and keep the class composed.
Give participants time to reset the Reformer and confirm their next starting position before beginning the next set of cues. Keep the transition short, but don’t rush the equipment change. If moving the box adds effort without supporting the class plan, remove it. Broader sequencing principles can help you place these moments well within the session; see this guide to sequencing a Reformer Pilates class.
Rehearse the instructions aloud as you plan. If the setup takes several explanations to make sense, simplify the change or choose a clearer variation. This is especially useful when participants are following different options. Keep your cues concise and use observation to guide individual adjustments.
Plan your next Reformer class with ReformerFlow## Build Box Work into a Reformer Class Plan You Can Teach with Confidence
A purposeful box setup is easier to teach when it’s part of a coherent class plan. Map the box choice to the exercise, participant starting position, equipment needs, cues, and next transition. This turns an idea into a teachable sequence while leaving room to adapt when the group or equipment calls for a change.
Use a repeatable pre-class box checklist
Write down what the box is meant to support and how participants will begin. Then check the full sequence against the actual Reformer model and the needs of the group. Treat the plan as a reference, not a script: use your training and observation to adjust it rather than asking participants to fit an unsuitable setup.
- Objective: Record what the box is intended to help participants explore.
- Exercise and position: Note the exercise, box orientation, and participant starting position.
- Equipment: Include the relevant Reformer setup and any spring details, then verify the box arrangement against the equipment instructions.
- Cues: Capture a brief setup cue, the starting position, and the first movement direction.
- Transition: Note what needs to move, where it goes next, and what participants should reset before continuing.
Review the checklist with the class in mind. If participants will need several different setups, consider whether each variation is manageable to supervise. If a box change interrupts the focus of the session, simplify the plan. The aim isn’t to preserve every planned exercise at all costs; it’s to make sound choices in the room.
Keep your teaching reference glanceable during class
Prepare exercise details before teaching so you can stay attentive to participants instead of searching for information mid-session. ReformerFlow provides more than 400 Reformer exercises with video, level, and spring-setup details, plus machine-specific spring configurations and a glanceable teaching mode. Use these references to streamline preparation, not as proof of a box setup or a substitute for instructor judgment.
For box work, apply your training and the applicable equipment instructions to the exercise-specific setup. Then adapt to what you observe: comfort, control, and how well each participant can follow the intended movement. Digital planning can help organize the sequence; your decisions in class determine whether it remains appropriate.
Using the pilates box in a reformer class becomes more straightforward when the plan connects intention, setup, cues, and transition. ReformerFlow is available on iPhone, iPad, and Android, with a 14-day free trial to explore its class-planning tools.
Explore ReformerFlow for class planning## Make Your Next Box Choice Deliberate
In your next class plan, choose one moment where a box might genuinely help participants engage with the movement. Decide what you want them to explore, then shape the exercise and transition around that intention. If the purpose isn’t clear, leave the box out. A simpler sequence can give you more room to observe, respond, and teach with focus.
Using the pilates box in a reformer class is a decision you can refine with practice. ReformerFlow can support your preparation with a library of more than 400 Reformer exercises, video and level details, machine-specific spring configurations, and a glanceable teaching mode. Use these planning references to organize your ideas, then rely on your training and observation to guide the class.
Explore ReformerFlow and start your 14-day free trialChoose with purpose, cue with clarity, and stay ready to adapt. Your next class can make the box feel like an integrated part of the teaching, not an extra piece of equipment.
Frequently Asked Questions
What is the Pilates box used for on a Reformer?
The box gives an instructor another way to position or support a participant during selected Reformer exercises. For example, it can provide an elevated surface for a seated position when the exercise and equipment setup allow. Choose it to serve the movement, not simply because it’s available. The participant’s comfort and control help you judge whether the setup is useful.
Can you use a Pilates box on every Reformer?
Not necessarily. Box dimensions, carriage design, and manufacturer guidance can affect whether a particular setup is appropriate for a Reformer. Before planning an exercise, check the equipment instructions for compatible placement and confirm that the box fits the intended arrangement without interfering with the apparatus. If the setup isn’t supported for that model, choose a carriage-based or otherwise supported variation that still serves the class objective.
Is the Pilates box suitable for beginners in a Reformer class?
It can be suitable for some beginners, but the box doesn’t automatically make an exercise easier or more accessible. Consider the person’s familiarity with the Reformer, ability to follow the setup, and response to the chosen position. You might demonstrate the arrangement before inviting participation, then offer a familiar alternative. Keep the decision individual: a setup that feels manageable for one beginner may not suit another.
How do you keep a Pilates box from moving during an exercise?
Use the box only in a placement supported by the Reformer manufacturer’s instructions, and confirm it’s stable before the participant begins. Keep straps or other loose equipment clear of the box’s contact area, and don’t ask a participant to compensate for a shifting setup while moving. If the box moves during the preparation check, stop and reset the arrangement or choose another setup before continuing.
Should every Reformer class include Pilates box exercises?
No. A box is an optional teaching tool, not a requirement for a balanced Reformer class. Include it when it supports a specific exercise or class intention and the transition is practical for the group. If the box adds setup time without improving the teaching focus, leave it out. A well-chosen carriage exercise can be the clearer option, even when a box is available.
How should a Pilates box be cleaned between classes?
Follow the care instructions for the specific box, since cleaning guidance can vary with its surface materials. Use the recommended cleaning method between classes, paying attention to the areas participants contact, and allow the surface to dry as directed before reuse. Avoid assuming every cleaner is appropriate. During routine care, look for visible damage or changes to the surface, and follow the manufacturer’s guidance if you find any.